图片旋转后像素情况分析
本文研究图片种某个区域被旋转后,其值变换情况
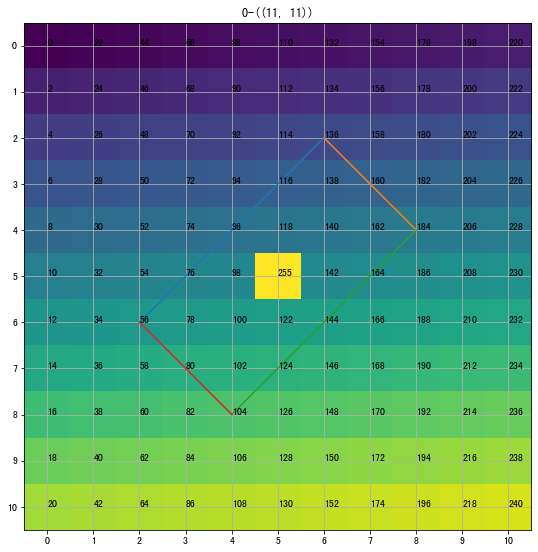
模拟生成一张 11x11 的图片,在中心点为 (5,5)、宽高为 (3,5)、旋转角为 45 的位置有一个旋转矩形,我们的目标将旋转矩形取出来,存储为 3x5 的标准图片,便于后续对旋转框内目标分析
1 | # 模拟待处理图片,每个交点是一个像素,里面的值模拟为像素值 |
本研究从旋转框内取子图的过程,并且实现以下两种方式取值
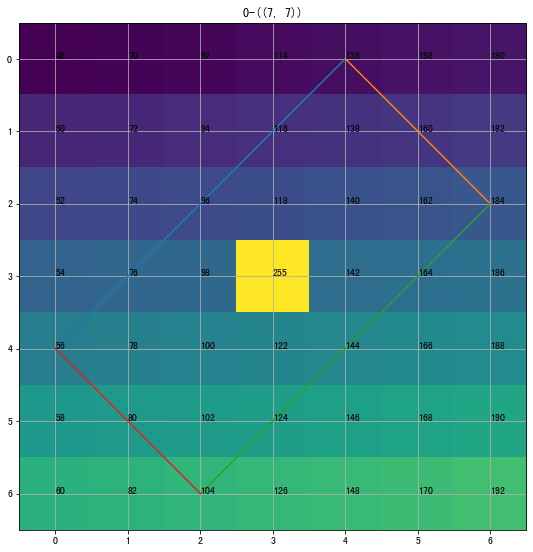
- 大图先旋转,将旋转框摆正后,再取子区域
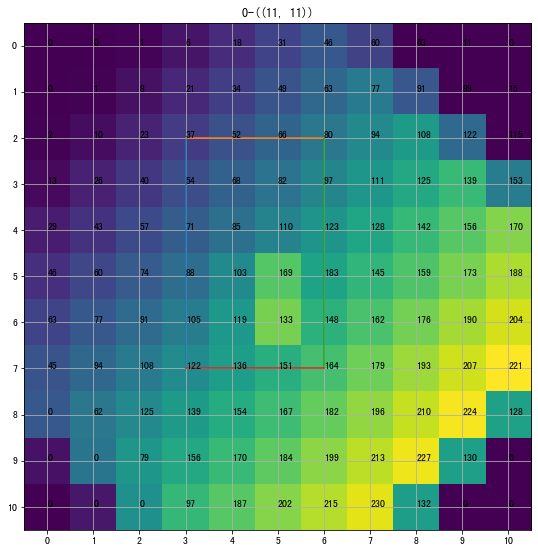
- 先从大图取出子区域的外接矩形,摆正这个子区域再取子区域
大图先旋转
1 | # 求一个点绕另一个点旋转后的位置 |
实际取出来的像素值是:
1 | [[ 68 85 103 119 136] |
先从大图取出小图
首先从大图取出目标区域的最小外接矩形
1 | # 获取旋转框的边界 |
然后旋转以上图片,并取出旋转矩形区域,得到以下结果
1 | # 将子图旋转为0度 |
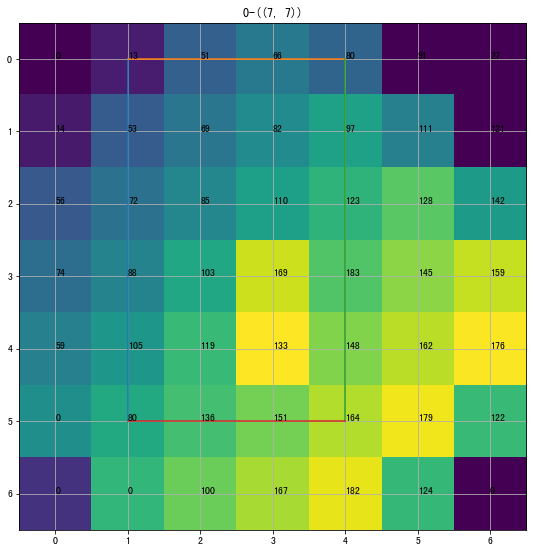
实际取出来的像素值是:
1 | [[ 69 85 103 119 136] |
可以看出两种方法,除了左上角位置差 1 个像素,其他位置保持一致。但是都可以看出经过旋转后的图片像素,相比较原始图片的像素值,都发生变化
也就是说,通过旋转目标检测找到的目标,如果要在其后使用其他检测,注意像素值已经变化